Difference between revisions of "Help:Using Content Map Converter"
Jump to navigation
Jump to search
| (5 intermediate revisions by the same user not shown) | |||
| Line 13: | Line 13: | ||
|} | |} | ||
<br> | <br> | ||
| − | <p>Before the Content Map can be uploaded onto WikiVet it must first be converted into a compatible format. This is done using another piece of software called [[Content Map Converter]]. This first needs to be installed. Visit [[Content Map Converter|here]] to | + | <p>Before the Content Map can be uploaded onto WikiVet it must first be converted into a compatible format. This is done using another piece of software called [[Content Map Converter]]. This first needs to be installed. Visit [[Content Map Converter|here]] to download the software and see its installation instructions.</p> |
<p>If you already have the program installed continue the walkthrough below.</p> | <p>If you already have the program installed continue the walkthrough below.</p> | ||
==Using the software== | ==Using the software== | ||
| − | # | + | The Content Map Converter software is intuitive to use, and has the following steps built into its help section. To access help within the program either go to the help tab or press 'F1'. |
| − | # | + | |
| − | # | + | #In Cmap export your content map as a webpage |
| − | # | + | #In ‘Content Map Converter’ select ‘Import code' |
| − | + | #Navigate to the location where the webpage was saved | |
| + | #Select the file (.html) and click ‘Ok’ | ||
| + | ::[[Image:UCMC1.jpg|300px]] | ||
| + | #The files code is now displayed in the main window of the program | ||
| + | #Click ‘Extract' | ||
| + | ::[[Image:UCMC2.jpg|300px]] | ||
| + | #Select the content map image by clicking browse then click ‘Ok’ | ||
| + | ::[[Image:UCMC3.jpg|300px]] | ||
| + | #Width and description are optional | ||
| + | #This generates the code for the Mediawiki extension ‘Imagemap‘ | ||
| + | #This code is displayed in the bottom window | ||
| + | ::[[Image:UCMC4.jpg|300px]] | ||
| + | #Click ‘Copy' or ‘Save’ from the file menu to store the results | ||
| + | #If you wish to repeat this process click 'Start Over' | ||
| + | |||
| + | Note: Code stored in the clipboard can also be used. | ||
| + | (Click ‘Paste code’ to do this) | ||
| + | <br><br> | ||
| + | ---- | ||
| + | <b>[[Help:Uploading a Content Map|Continue to the next step]] | ||
| + | [[Category:Help]] | ||
Latest revision as of 21:05, 24 February 2010
|
|
| What are content maps? | 1. Creating a Content Map | 2. Using Content Map Converter | 3. Uploading a Content Map | 4. Updating Previous Content Maps | All Content Maps on WikiVet |
|---|
Before the Content Map can be uploaded onto WikiVet it must first be converted into a compatible format. This is done using another piece of software called Content Map Converter. This first needs to be installed. Visit here to download the software and see its installation instructions.
If you already have the program installed continue the walkthrough below.
Using the software
The Content Map Converter software is intuitive to use, and has the following steps built into its help section. To access help within the program either go to the help tab or press 'F1'.
- In Cmap export your content map as a webpage
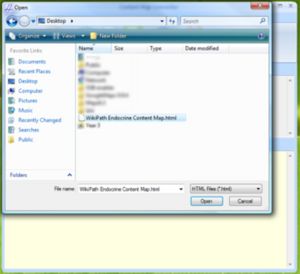
- In ‘Content Map Converter’ select ‘Import code'
- Navigate to the location where the webpage was saved
- Select the file (.html) and click ‘Ok’
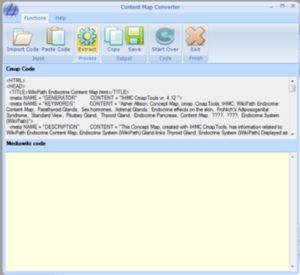
- The files code is now displayed in the main window of the program
- Click ‘Extract'
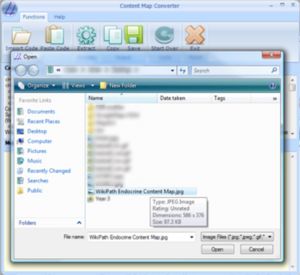
- Select the content map image by clicking browse then click ‘Ok’
- Width and description are optional
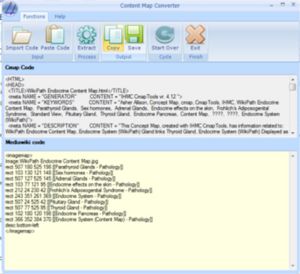
- This generates the code for the Mediawiki extension ‘Imagemap‘
- This code is displayed in the bottom window
- Click ‘Copy' or ‘Save’ from the file menu to store the results
- If you wish to repeat this process click 'Start Over'
Note: Code stored in the clipboard can also be used.
(Click ‘Paste code’ to do this)


